One of my favorite things about the Creative Residency so far is the opportunity to create swag for upcoming events. As a designer, I’m a swag critic and hoarder myself (admit it, designers — you will never say no to a free postcard, tote bag or notebook, especially if it’s well-designed!) so getting to actually have a hand in what constitutes as freebies is so much fun.
I’d say that one of the more unique physical things I create are clear stamps, and it’s always top of the list for swag to design. The only thing is, clear stamps aren’t as self-explanatory as a screen printed tote bag or blank journal. Scrapbookers are super familiar with what they are, how they work, and even what to use them for, but non-scrapbookers can be pretty clueless in the beginning, often asking me how they work and ultimately, what to stamp them on, but they’re usually quick converts when they see how cool and easy they are to use.
Brainstorming + Design
When Libby first asked if I was free to design a stamp kit for the upcoming VidCon conference, I said yes right away — yay, another chance to work on a swag kit! Dread started to kick in after a few minutes, though. VidCon? A conference for YouTubers? What will they possibly need stamps for, and will they even care, since they’re always on camera or on their computers?
I immediately thought of the icons that vloggers and YouTubers are most familiar with — the play, share, and replay buttons. After I finally ran out of ideas, I ran to fellow Creative Resident and vlogger extraordinaire Sara Dietschy for some phrases to use. “We’ll fix it in post” was my favorite of her suggestions, and I included a stamp that said, “BRB I’m editing”, remembering how, during our week to launch the Residency program in NY, Sara was running all over the place and usually busy editing the videos she shot that day.
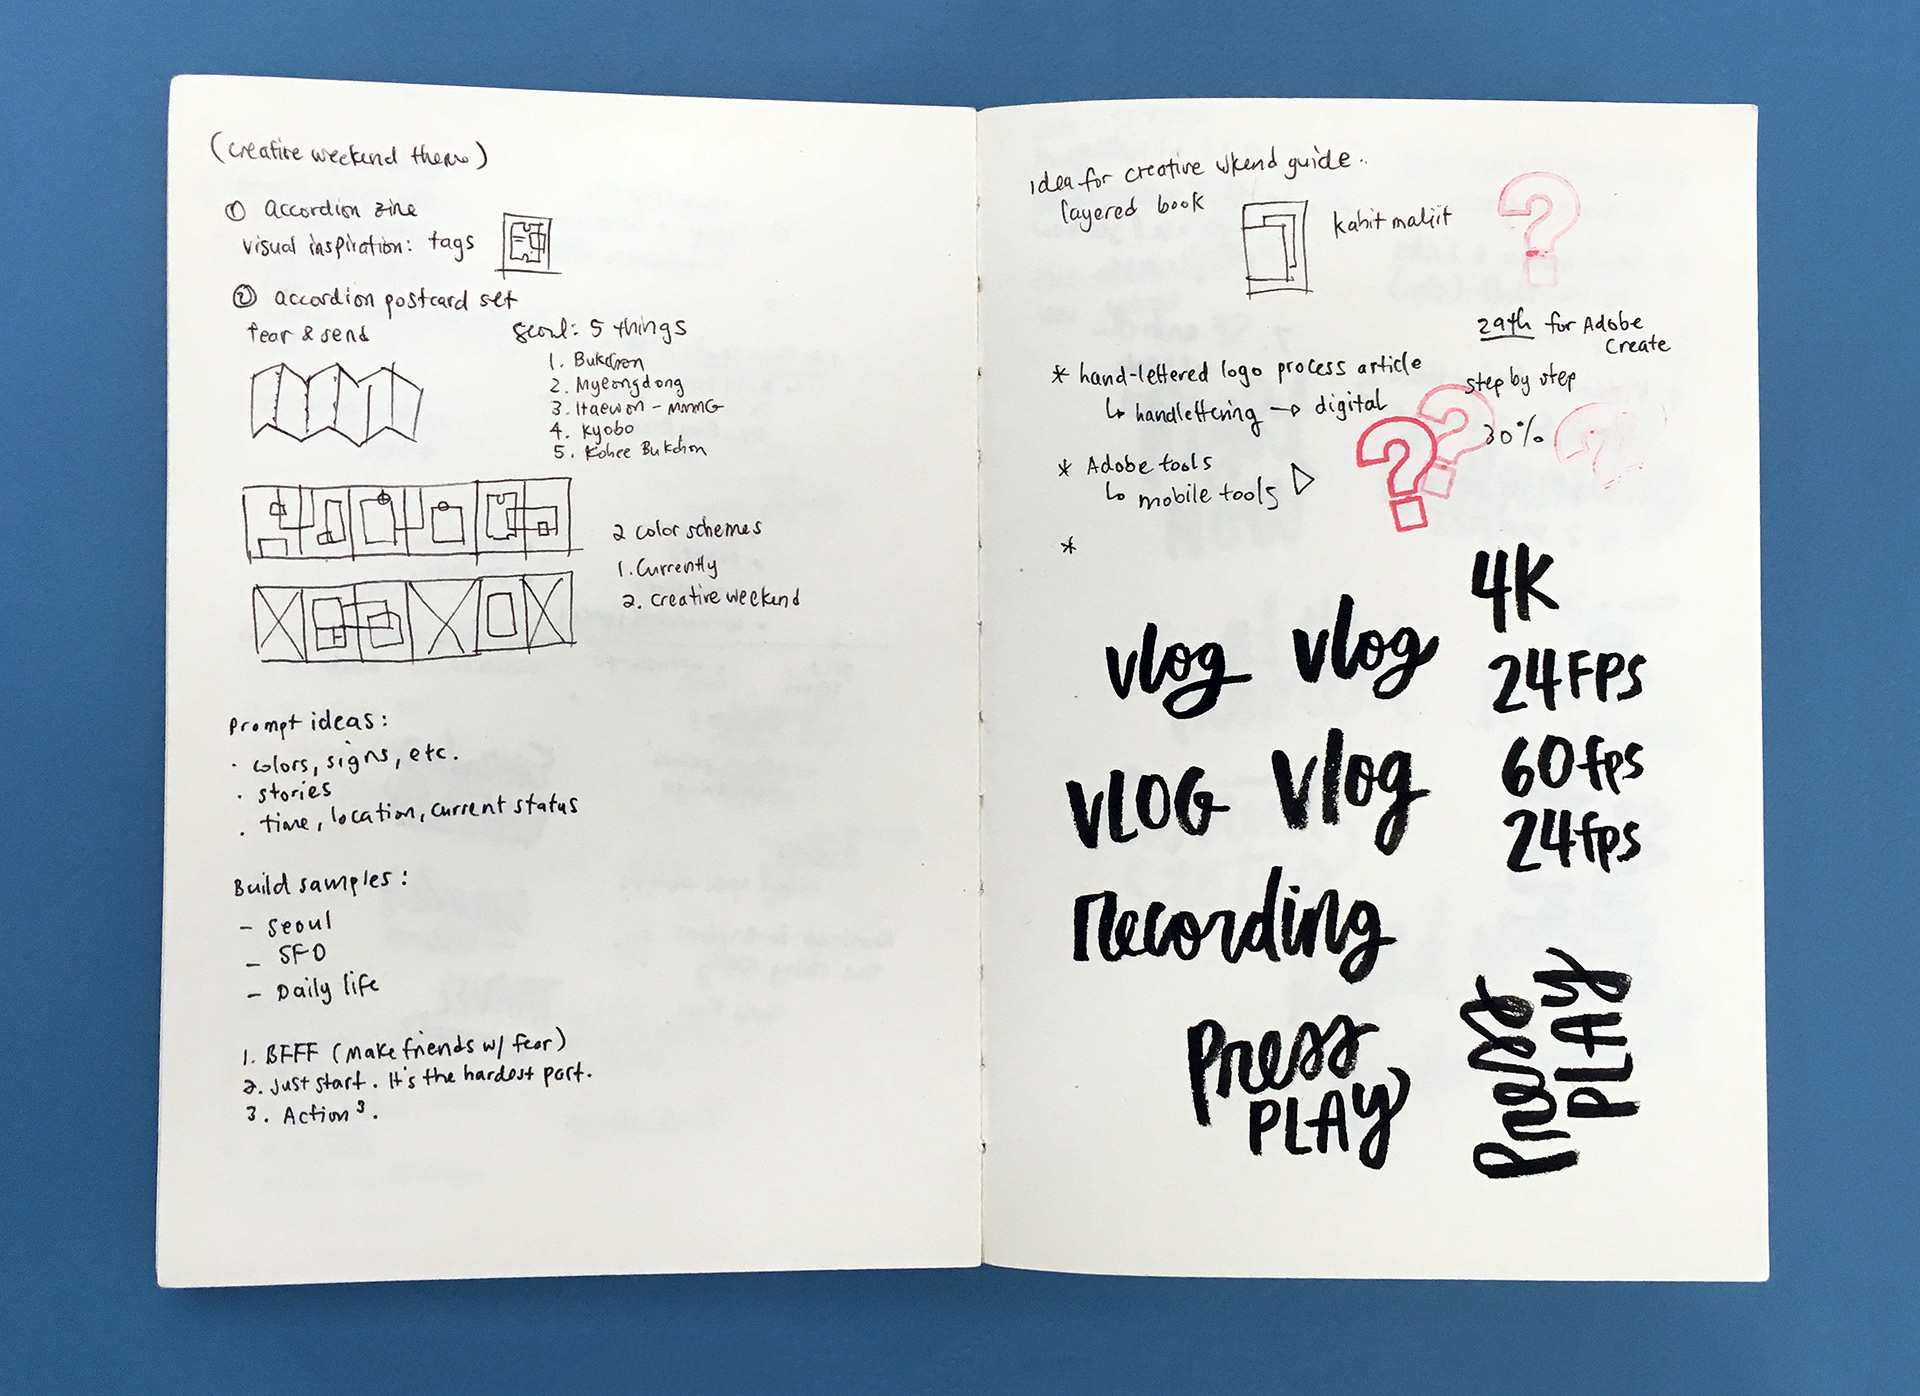
A page from my Residency sketchbook where I wrote out the phrases with a brush pen and took a photo with Adobe Capture
to vectorize 'em instantly!
to vectorize 'em instantly!
I finalized the vector art for the icons on Illustrator, and got to use Adobe Capture for the brush lettering sections — instant vectorizing and the Send to Illustrator feature is the best. ;)
I was a bit stuck on what vloggers and YouTubers might possibly use the stamp set for. If they’re usually making videos on the computer, how can stamp sets come in handy? After much back and forth with Libby, I figured that YouTubers at VidCon are probably swapping information and channel usernames, and this set could be a great way to get their channels out there.
Proposal and Final Design Things

I put together a little document to show what would go inside the kit, as well as the final design for the stamps that I had decided on and presented it to Libby and Heidi. Thankfully they loved the idea and we were off to make them real!
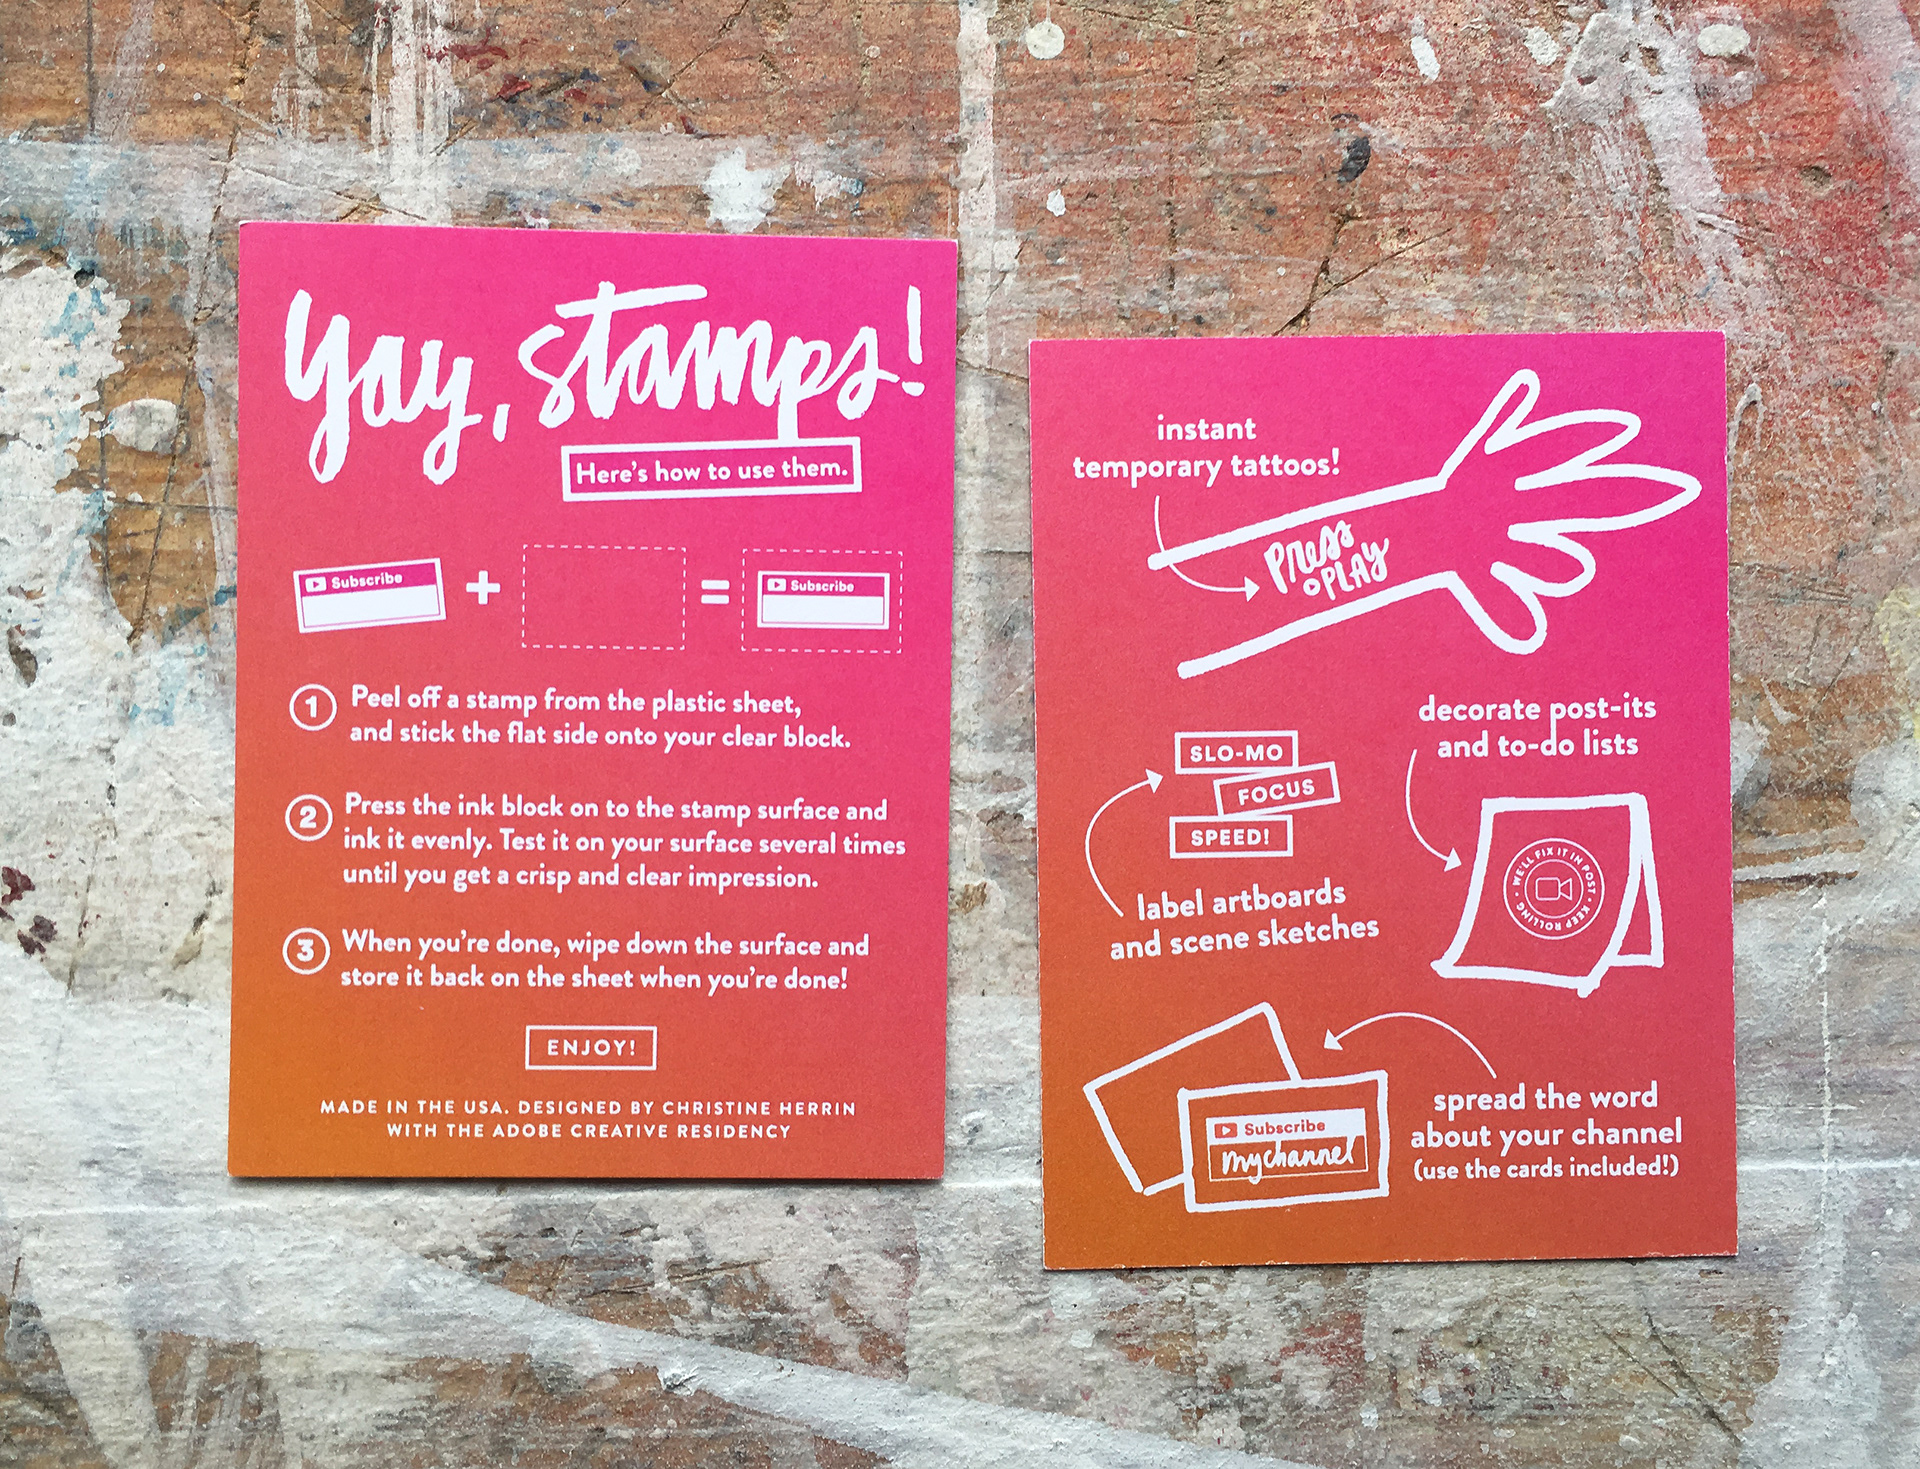
A double sided card with instructions + silly ideas on what to use the stamps for :)
I designed a card to include instructions on how to use the stamps, as well as a few ideas on what to use them for! During our Residency dinner, I had made a similar stamp set but only included how to use them. A lot of the attendees were really amused and tried stamping them on some pads of paper that we left on the tables, but Ryan Essmaker (one half of the amazing duo behind The Great Discontent), seated at our table, went on to stamp on himself. I had to laugh out loud that he found a new use for the stamps: instant temporary tattoos!
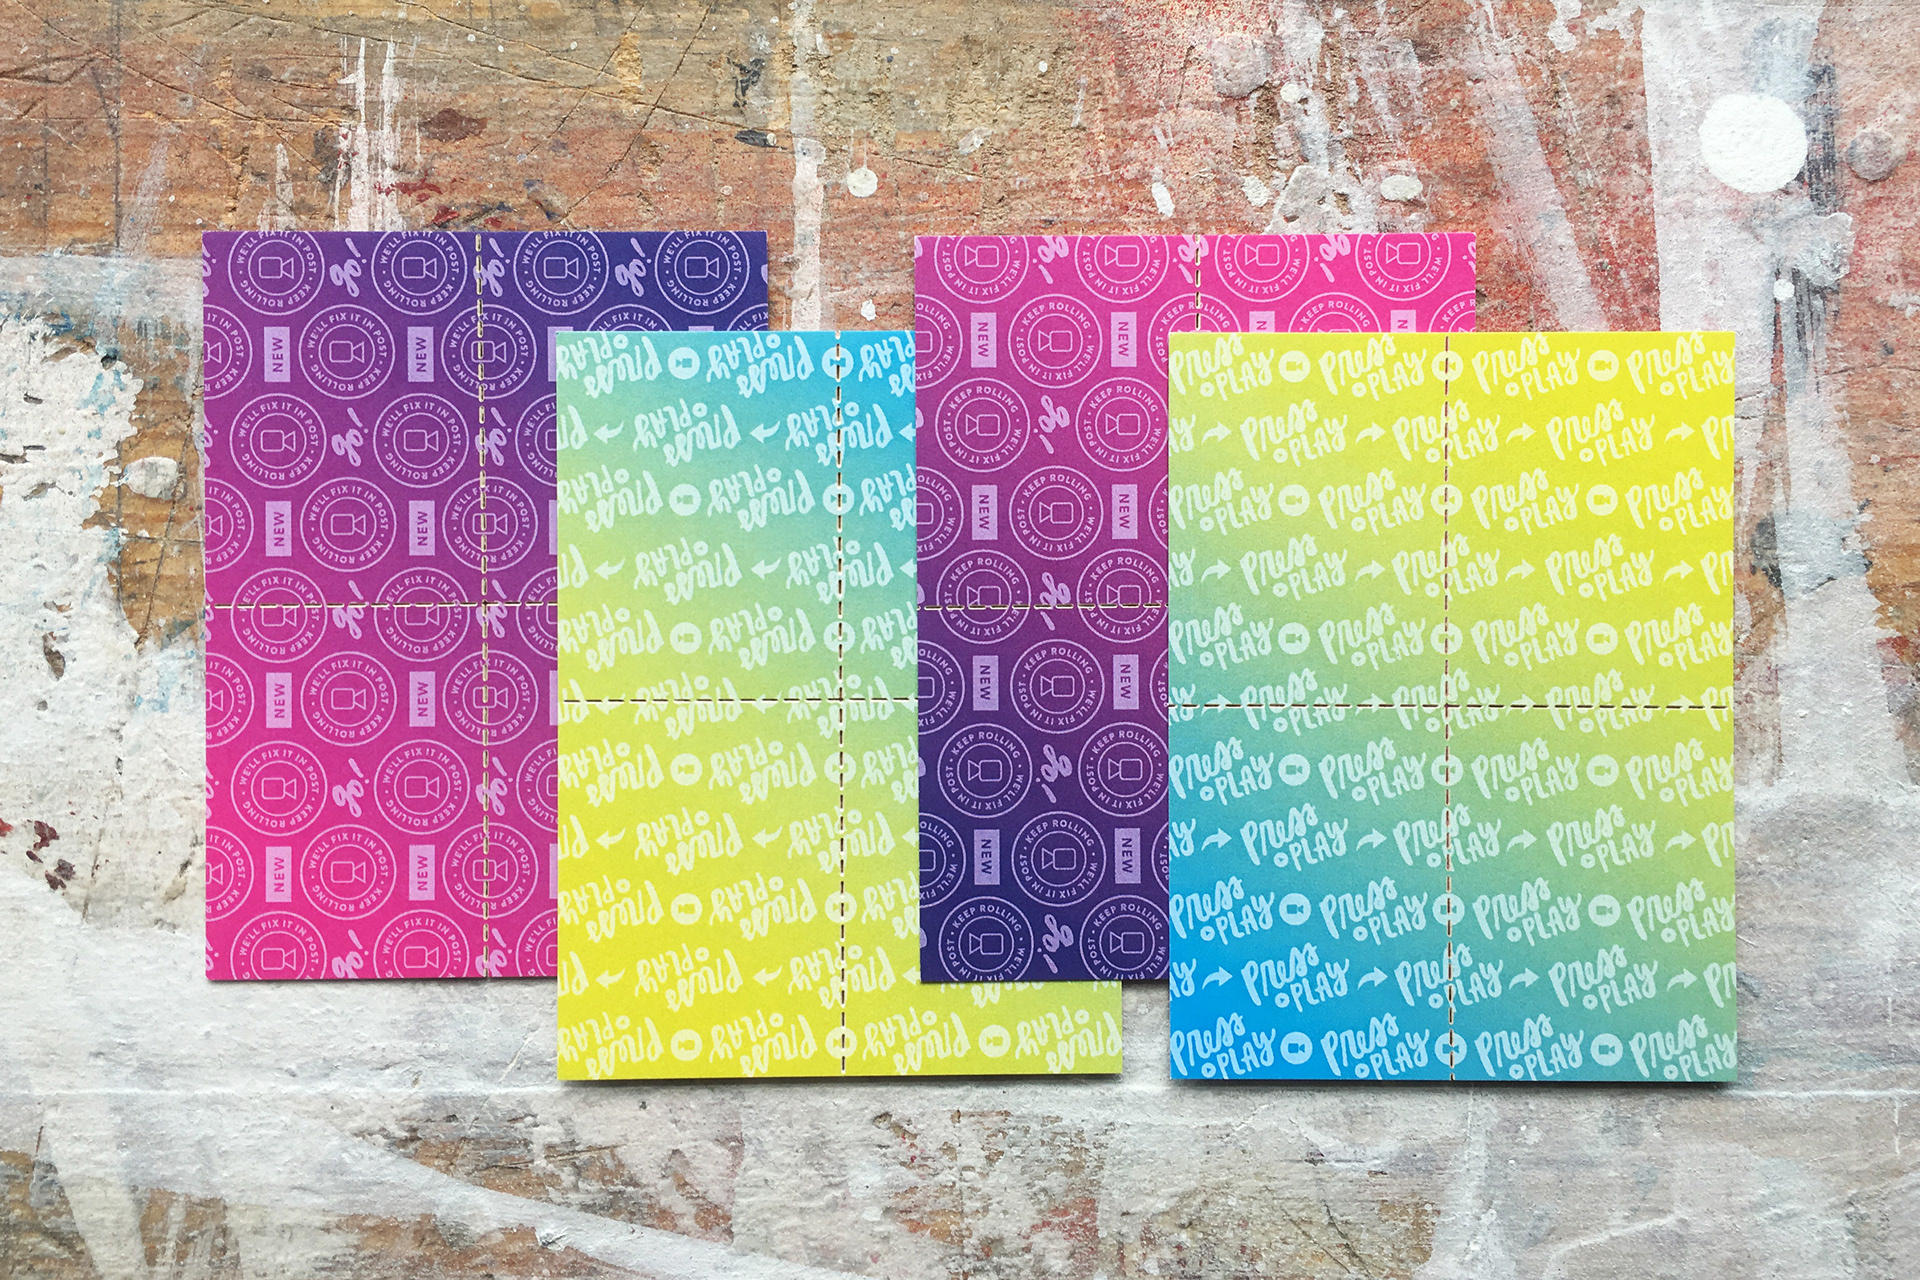
We had two designs for these perforated cards, but I packaged them like this — looks like FOUR designs, eh?? Right? Right? ;D
I also included several blank cards that were perforated for quick stamping and sharing during the conference. These were so much fun to make, and I was excited to use bright colors and gradients to match the energy at VidCon.
Assembly
I set up a little assembly line at home to stamp on all the outer sleeves for the stamps. This Creative Residency stamp that says "Create Something Today" has definitely gotten good mileage with all the swag we’ve made with it!
I made these little kraft sleeves by trimming a standard #10 Open End kraft envelope. Conveniently, they're what's left after I cut the kraft envelopes to make sleeves for my regular stamps — see that packaging here.
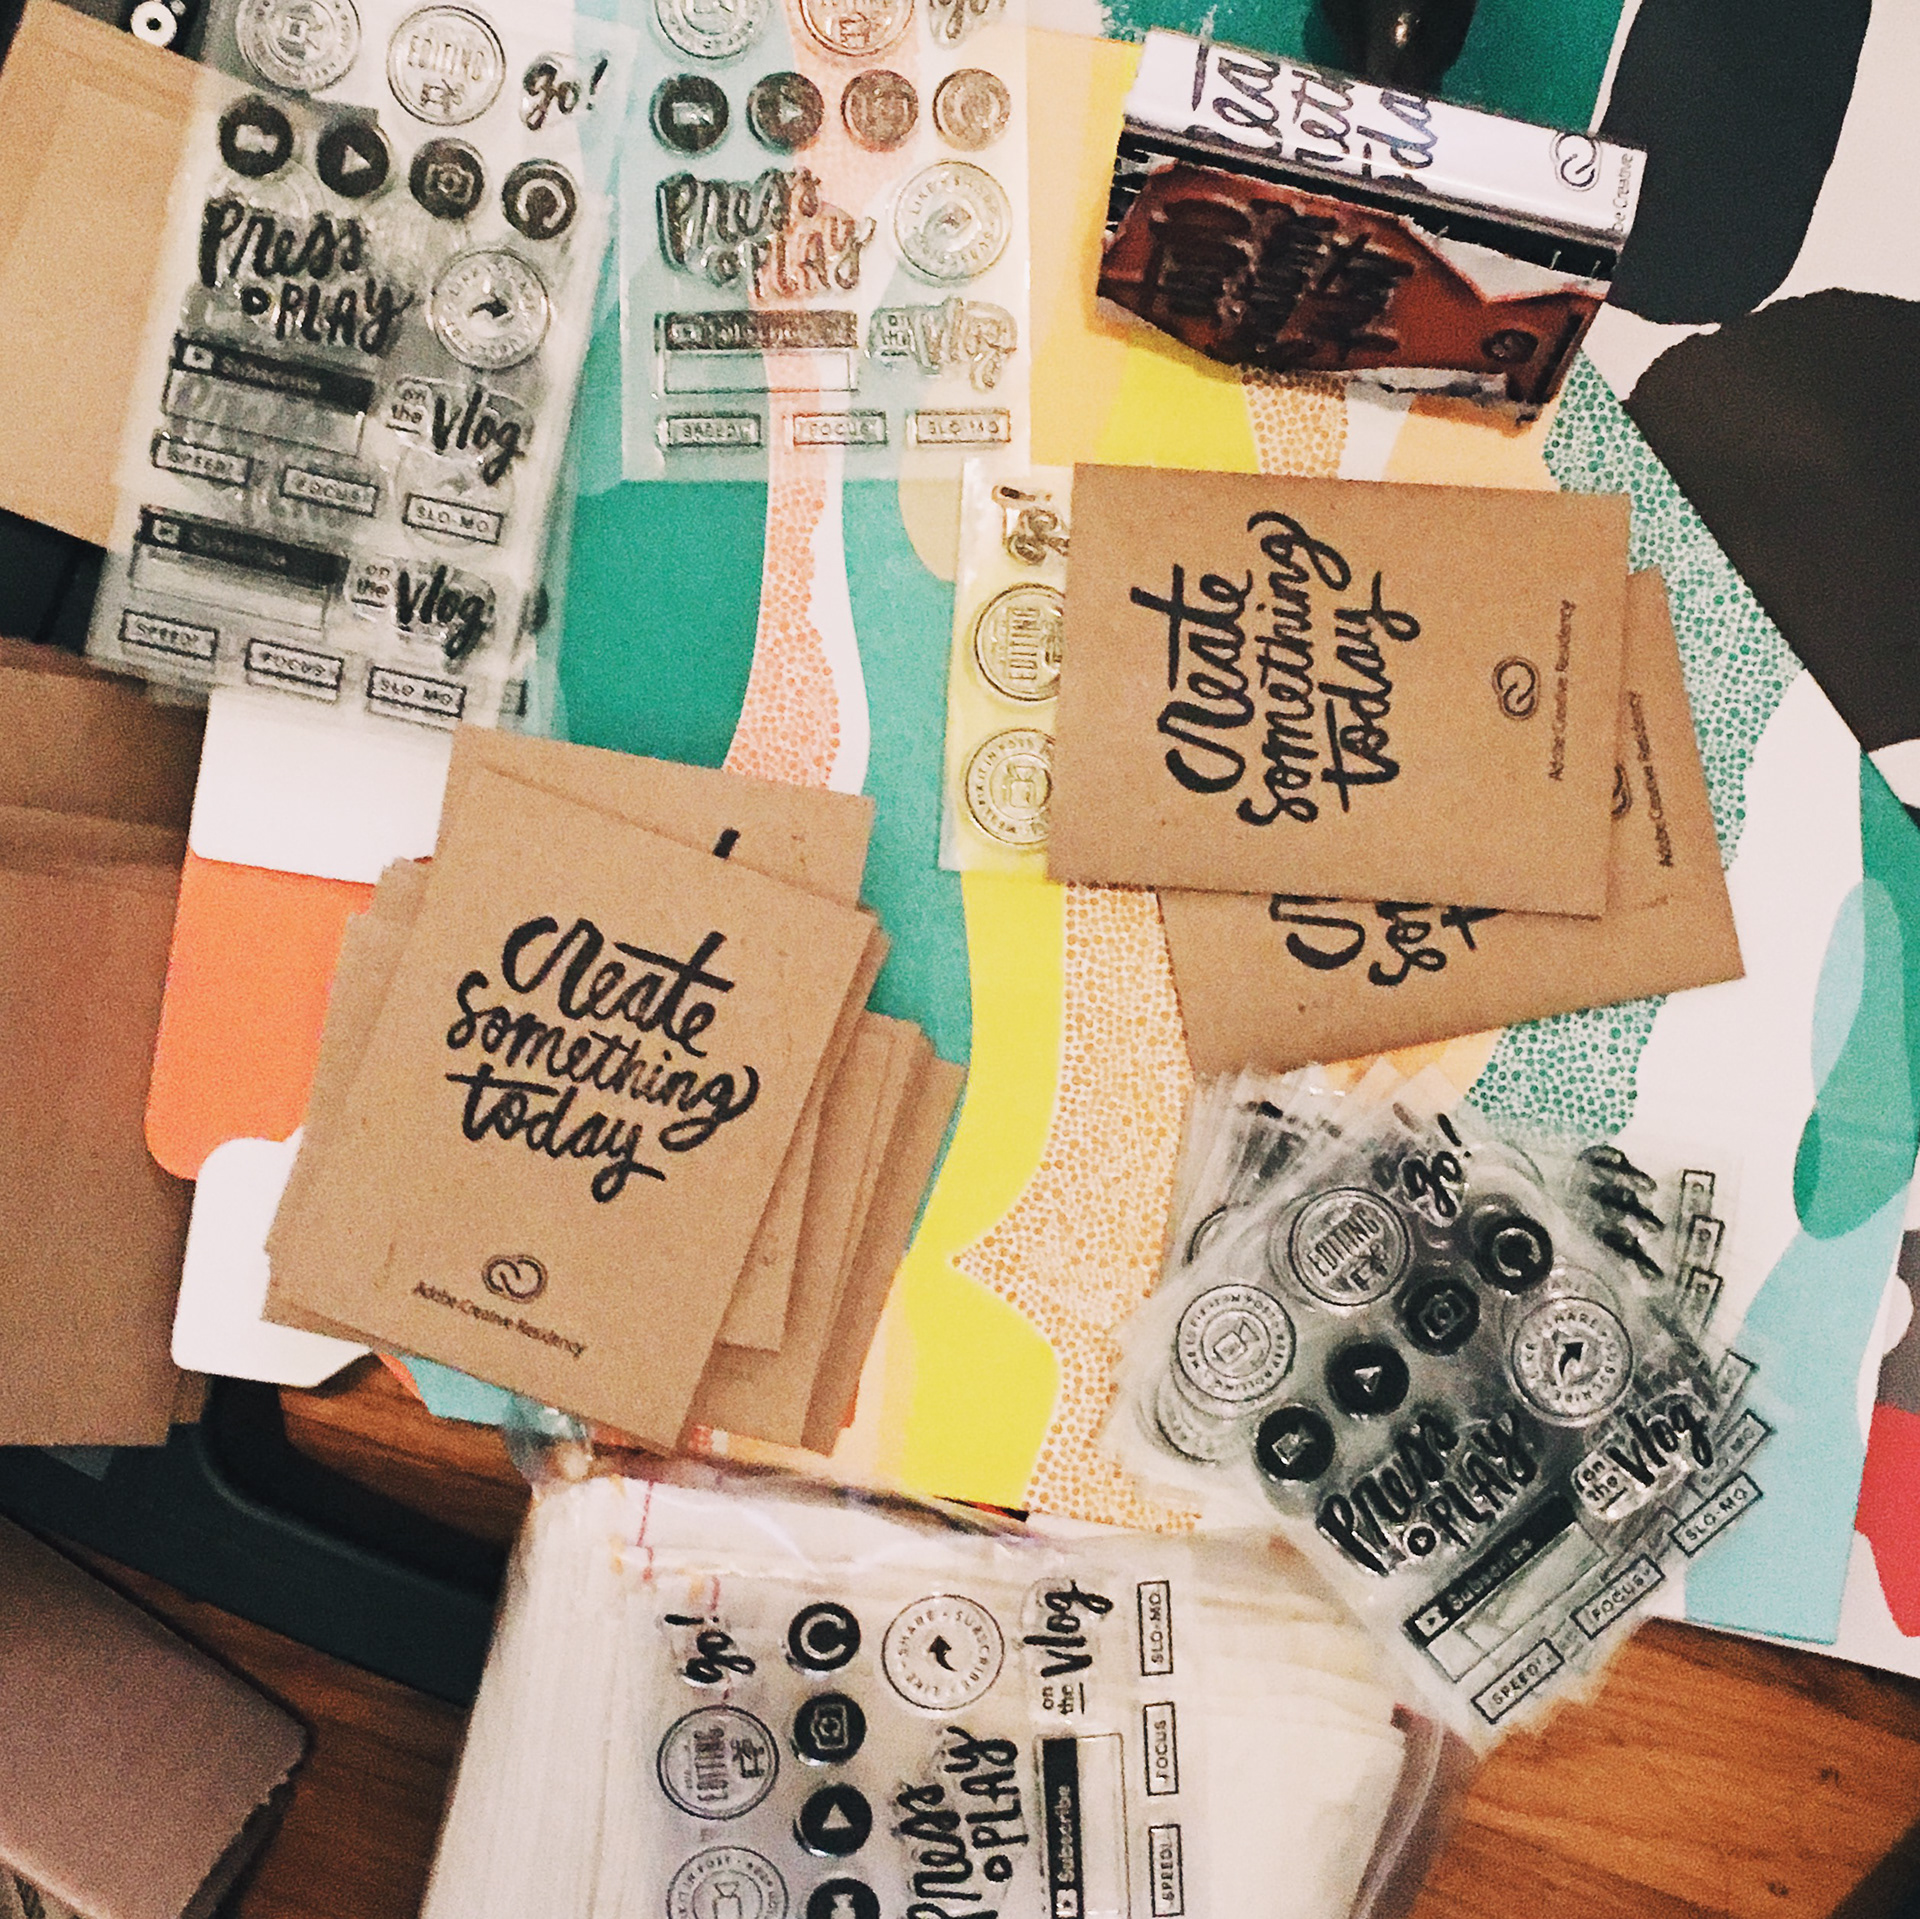
Thankfully, for the actual assembly of the kits, I got Heidi and Libby to help me. I also kinda loved that we were putting them together at the Adobe office and so many people stopped by to see what we were working on — I think the neon color explosion got their attention!
Final Kit
I really kinda love putting little kits like this together — it’s good practice for how I eventually want to package my stamps for a wider audience. It’s also a good chance to think about how non-scrapbookers can use these and what other activities I can think of for people to make stuff around it!
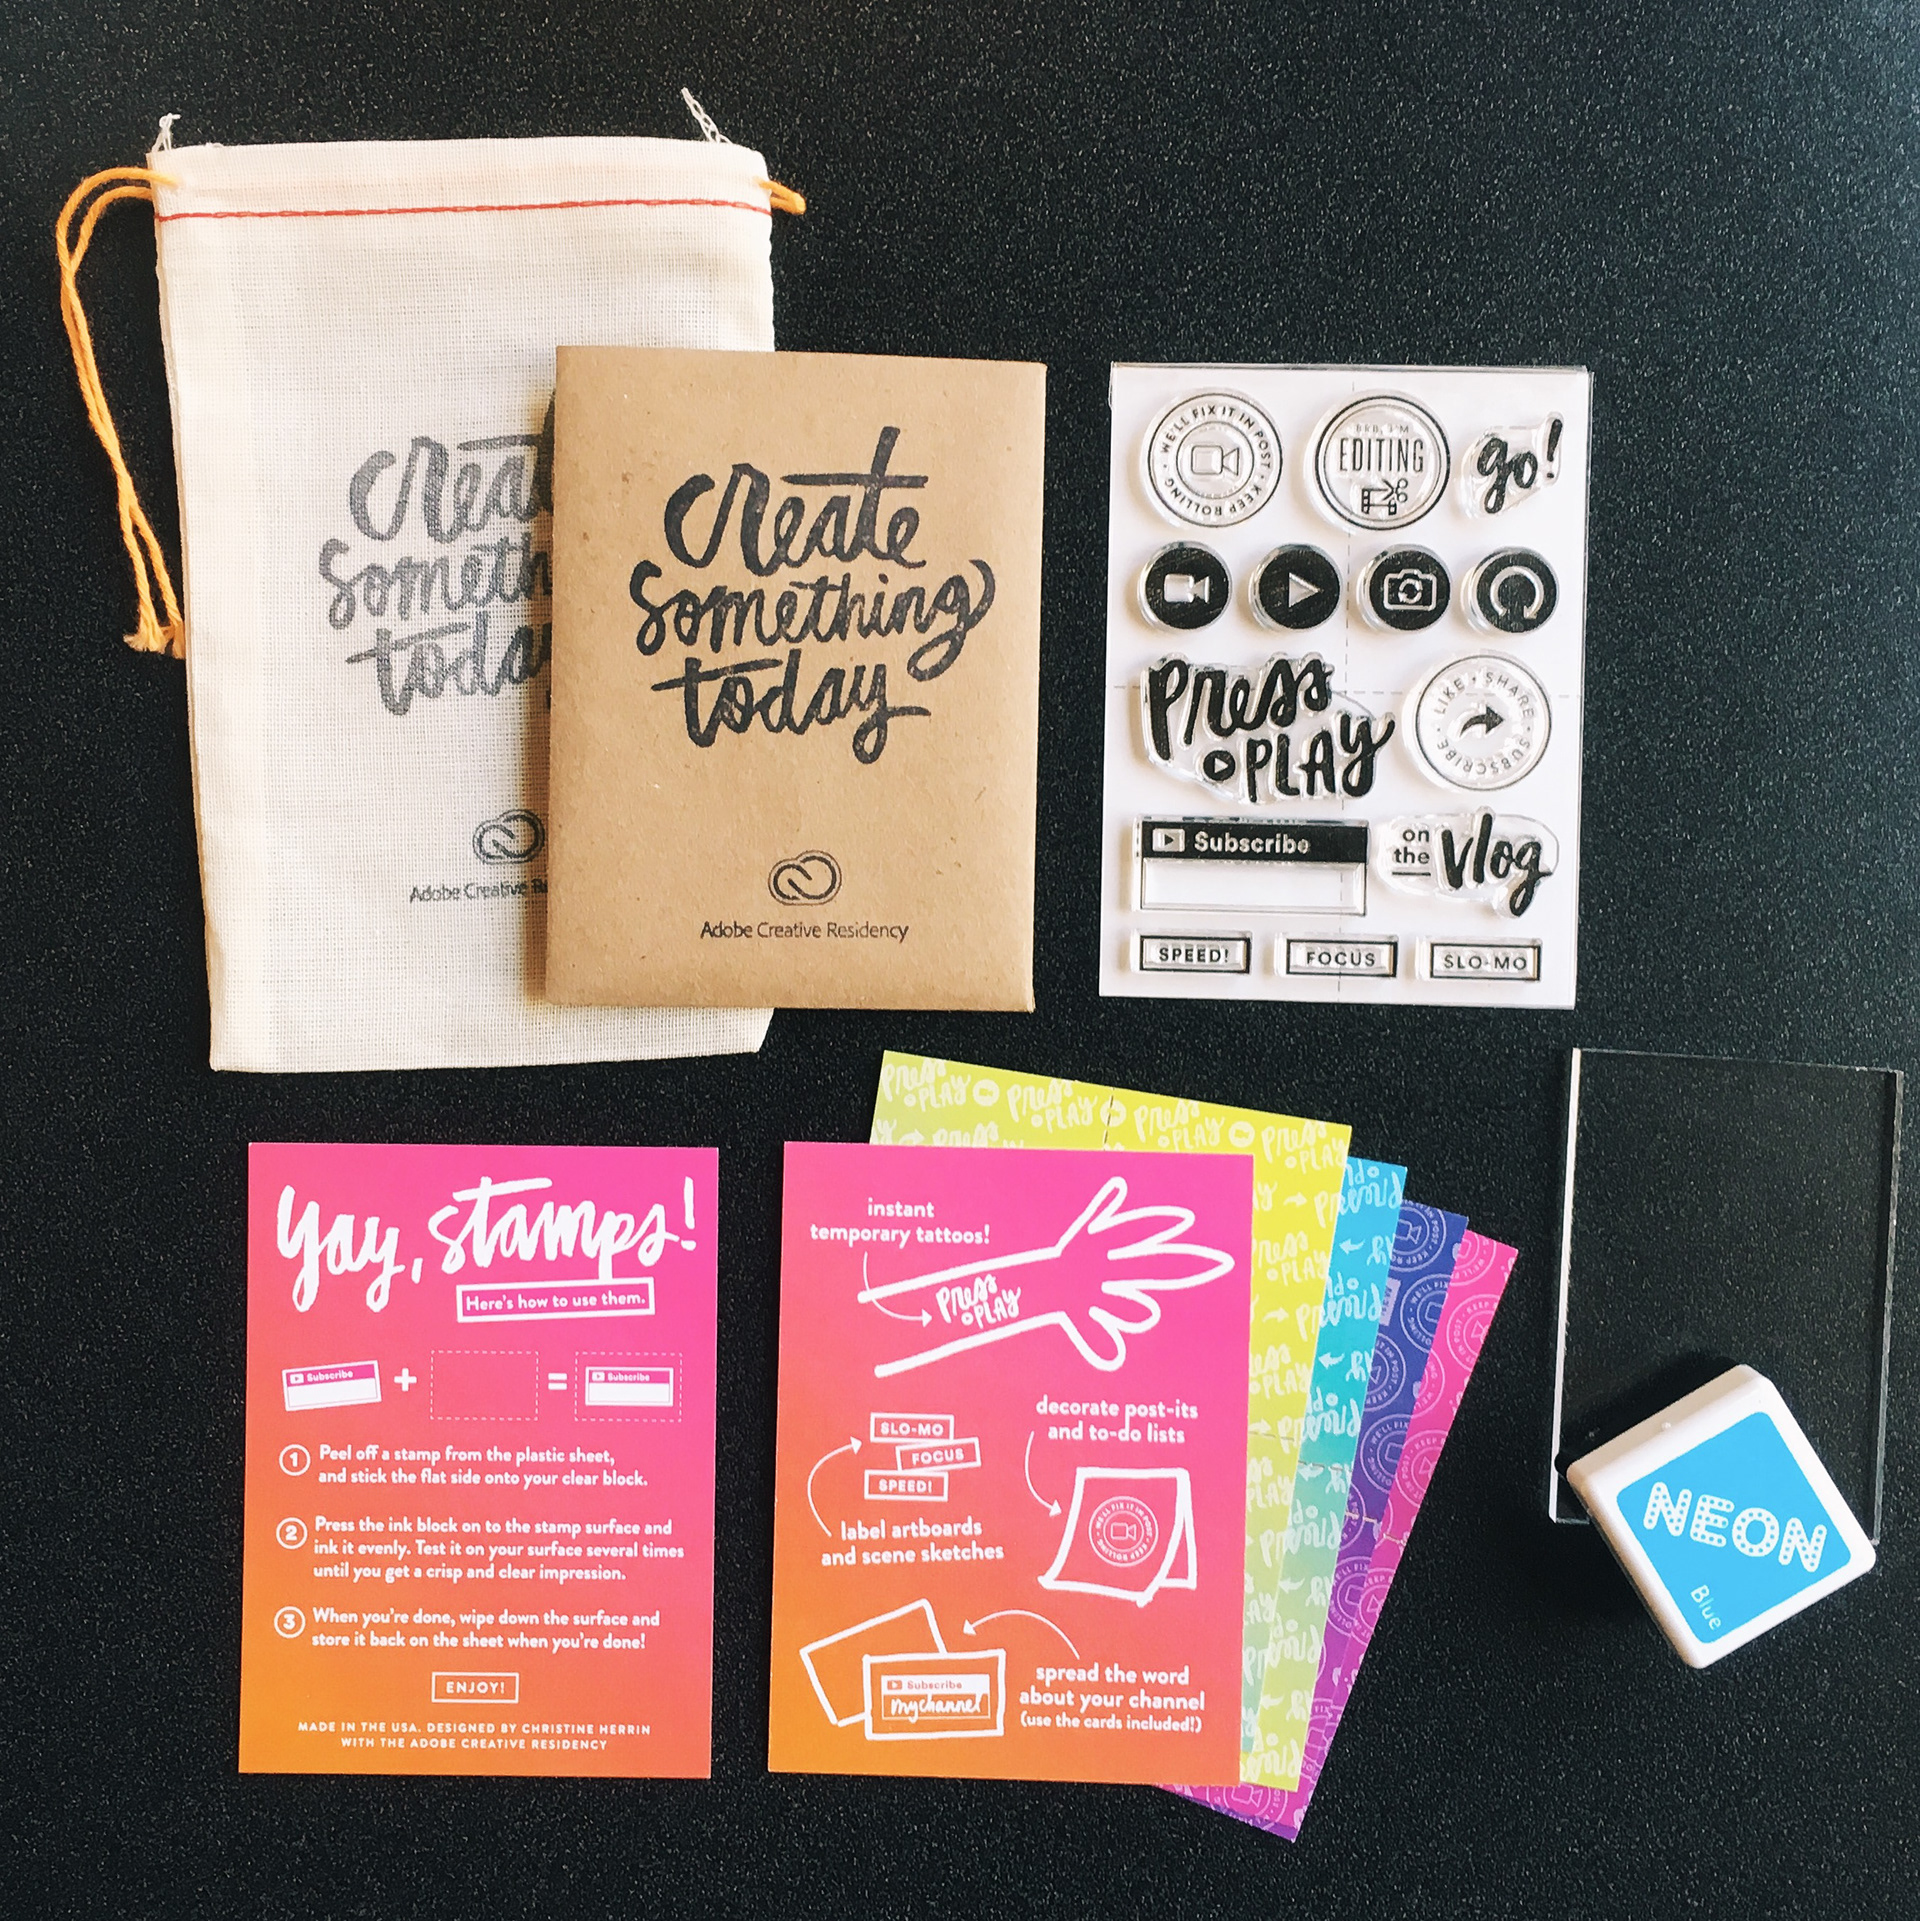
Stamps went in a kraft sleeve. Loose cards included an instruction card, and four cards perforated into four for them to stamp on the "Subscribe" stamp and trade with other YouTubers. Also included a clear block and mini neon ink pad.